This original recipe came about by accident during a cinnamon roll experiment. My dough was too soft, so instead of tossing it, I added apples and turned it into a Danish-style brunch bake. The result is this gluten-free apple cake recipe. It tastes like cinnamon rolls but has the texture of a danish-style brunch cake. A friend with Celiac tried it and loved it so much, he asked for more for Easter. Sometimes the best recipes come from happy mistakes. I think you’ll love this gluten-free apple cake. You’ll find the printable recipe card and a quick video walk-through towards the end of this article.
Ingredients & Substitutions
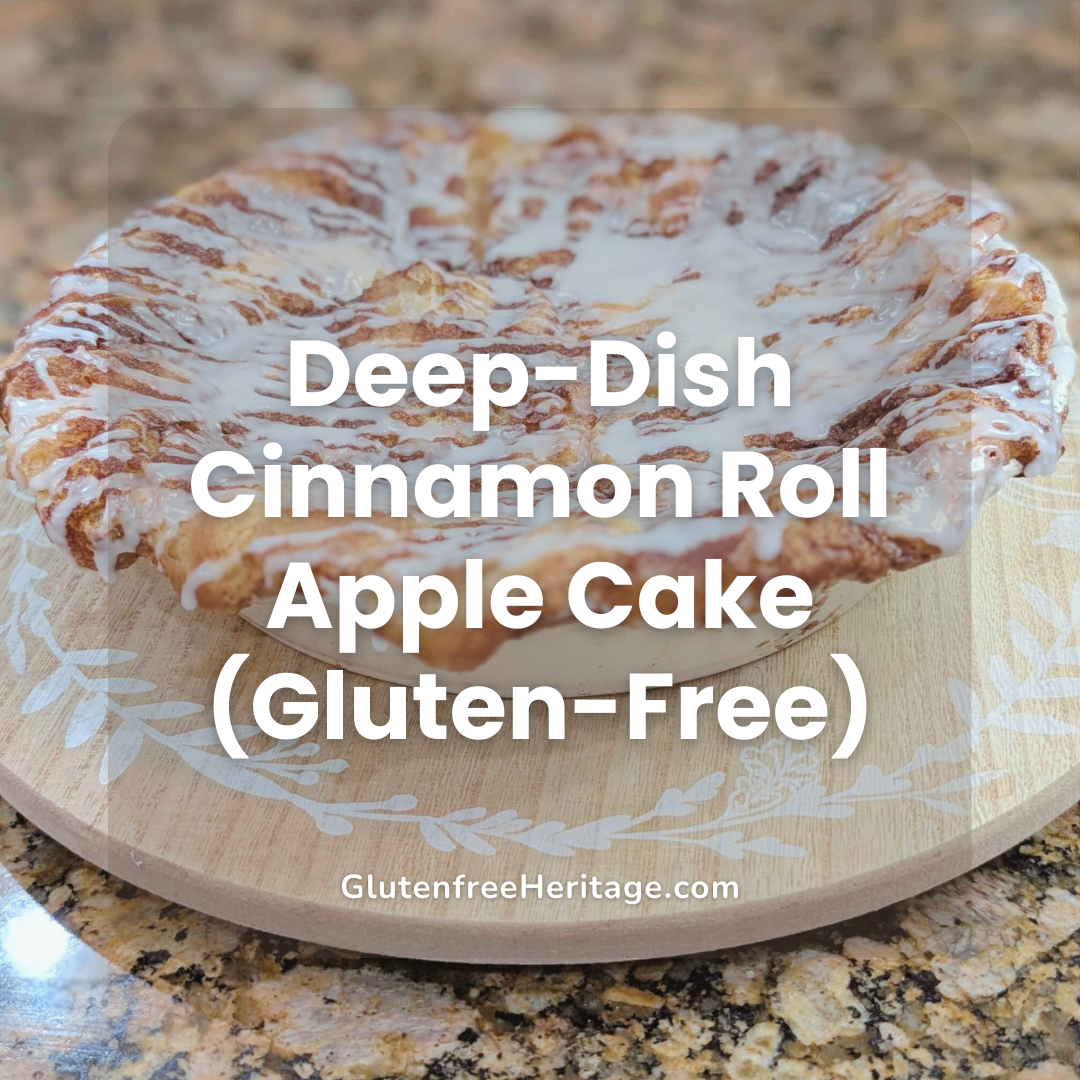
This cake has a thick, moist, and slightly dense base, with the chewy texture you’d expect from a good cinnamon roll. It’s heavier than coffee cake and thicker than most store-bought Danishes, but the flavor is wonderful. I used a 16-ounce jar of canned apples in cinnamon syrup. If you use store-bought apple filling, you might want to use less brown sugar. This version was just sweet enough with the thick cake bottom.
Flour Blend
For the gluten-free flour blend, I use millet, white rice flour, oat, tapioca starch, and potato starch, all milled as finely as possible. I use a Nutrimill Harvest on its finest setting, but the Nutrimill Classic works too. Later in the recipe, this gluten-free blend comes together with psyllium husk powder and eggs. I haven’t tried this recipe with xanthan gum, since I prefer psyllium husk powder.
Binders
Binders are key for holding gluten-free baked goods together. In this cake, psyllium husk gel and eggs provide structure. Yeast, activated with warm milk and white sugar, helps the cake rise and gives it a fluffy texture.
Apple-Cinnamon, DanishTopping
I used about 1 pint (16 ounces, or roughly 450 grams) of home-canned, drained, sliced apples in cinnamon sugar syrup. I canned them when fresh apples were at their most flavorful during apple season, thanks to a big box of Azure Standard’s best apples. You can use the same amount of apple pie filling instead. If your filling is very sweet, try using a little less cinnamon swirl; the full amount works well with a less-sweet, thicker cake batter. You can also thinly slice fresh apples and sauté them in butter and brown sugar for about 15 minutes, until soft.
Cinnamon Swirl & Cream Cheese Glaze
The cinnamon swirl and cream cheese glaze are made in two steps. First, mix butter, brown sugar, and ground cinnamon, and dollop it over the cake. Then, finish with a sweet cream cheese icing made from cream cheese, more butter, powdered sugar, vanilla extract, a pinch of fine sea salt, and a little cream or milk to thin it. Let all wet ingredients come to room temperature for easier mixing.
Preparing & Baking Tips
I used the Bosch Universal Plus Mixer for all the mixing in this recipe. Its large capacity makes it easy to double- or triple-batch, and you can switch out paddles, whisks, and dough hooks from the top. Don’t forget to watch the companion video for this recipe.
After milling and blending the flours, mix the dry and wet ingredients to form a dough. Let the batter rest for its first rise. I found that 30 minutes works perfectly.
Next, generously butter a 9- or 10-inch deep-dish pie plate or a 9-inch cake pan. Add the dough, layer the apple slices on top, and spoon on the brown sugar and cinnamon-butter. Set it aside for a second rise. Like cinnamon rolls, this cake needs both a batter rise and a cake rise to become light and airy.
Bake the cake on the center rack at 350°F for 35 to 45 minutes, until the top is a deep golden brown, the edges are set, and the center is not wet. If it browns too quickly, cover it loosely with aluminum foil. A toothpick or skewer should come out with moist crumbs, not raw batter. I checked the cake at 40 minutes and 195 degrees to make sure it was done. The cake is thicker and more substantial than coffee cake, with a moist, slightly dense crumb and a chewy texture like a cinnamon roll. Once it has cooled for 10 to 15 minutes, top it with the Danish-style cream cheese mixture.
This recipe takes about 2 to 2 1/2 hours from start to finish, including milling the flours, mixing, hydrating the dough, letting the cake rise, baking, cooling, and glazing. It’s a labor of love and perfect for potlucks, brunch, or special holidays.
Recipe

Deep-Dish Cinnamon Roll Apple Cake (Gluten-Free)
Equipment
- 1 Bosch Universal Plus Mixer Use code VINTAGEVIRTUES for $20 off at https://nutrimill.com/VINTAGEVIRTUES
Ingredients
Flour Blend (for Batter)
- ½-–⅔ cup fresh-milled millet flour, very fine (70 g)
- ½-⅔ cup fresh-milled white rice flour, very fine (70 g)
- ⅓ cup fresh-milled oat flour, very fine (40 g)
- ¾ cup + 2 tablespoons tapioca starch (110 g)
- ⅓ cup potato starch (50 g)
Batter (Base “Roll Cake” Layer)
- 2¾ teaspoons active dry yeast (9 g)
- ¼ cup granulated sugar (50 g)
- ¾ teaspoon fine sea salt (4 g)
- 1 tablespoon psyllium husk powder, lightly packed (9 g)
- ~½ cup warm water, for psyllium gel (105 g)
- 1¼ cups warm whole milk, 105–115°F (300 g)
- 2 large eggs, room temperature (about 100 g without shells)
- ¼ cup unsalted butter, melted and cooled slightly (4 tablespoons / 56 g)
- 1 teaspoon apple cider vinegar (5 g)
Apple Layer
- 2 cups sliced cinnamon apples in medium syrup, drained (about 16 oz / 450 g) *Homemade pint jar or equivalent apple pie filling
Cinnamon Swirl
- ½ cup very soft unsalted butter (1 stick / 113 g)
- ¾ cup packed brown sugar (150 g)
- 1 tablespoon + 1 teaspoon ground cinnamon (12 g)
- ⅛ teaspoon fine sea salt, pinch (1 g)
Cream Cheese Glaze (Danish-Style)
- 3 ounces cream cheese, softened (about ⅓ cup / 85 g)
- 1 tablespoon unsalted butter, softened (14 g)
- 1 cup powdered sugar (120 g)
- 1-2 2 tablespoons milk or cream, plus more as needed (up to 30 g total)
- 1 teaspoon vanilla extract (5 g)
- Tiny pinch fine sea salt (about 0.5 g)
Instructions
- Mill millet, white rice, and gluten-free oats as finely as possible. Measure 70 g millet flour, 70 g white rice flour, and 40 g oat flour into a bowl. Add 110 g tapioca starch and 50 g potato starch. Whisk very well to evenly combine and break up any lumps. This is your 340 g flour blend.
- Make the psyllium gel: In a small bowl, whisk 9 g psyllium husk powder into 105 g warm water until no dry spots remain. Let sit 3–5 minutes until thick, glossy, and stretchy.
- Bloom the yeast: In the bowl of a stand mixer, combine the 300 g warm milk, 50 g granulated sugar, and 9 g active dry yeast. Stir and let sit 5–10 minutes, until foamy and expanded.
- Add the psyllium gel, 2 large eggs, 56 g melted butter, and 5 g apple cider vinegar to the yeast mixture in the mixer bowl. Whisk or stir until the wet ingredients are well combined.
- With the mixer fitted with the paddle or whisk attachment on low speed, add the flour blend to the wet ingredients a little at a time. Once all the flour is in, increase speed to medium and beat for 4–5 minutes. The batter should be smooth, glossy, and very soft, thicker than cake batter but looser and more spoonable than traditional bread dough. If it seems extremely loose and pours readily, beat in 1–3 tablespoons additional flour blend; if it is stiff and holds a firm dough ball, add warm milk a tablespoon at a time.
- Let the batter rest in the bowl for 10–15 minutes to fully hydrate. It will thicken slightly but should remain soft and scoopable, holding a loose mound briefly before slowly settling.
- First rise: Lightly oil the top of the batter and cover the bowl. Place in a warm spot (80–90°F) for about 30–45 minutes, until visibly puffed and slightly domed. It may not double but should look lighter and aerated. I used a temperature-controlled, proofing box.
- Generously butter a deep-dish pie pan (9–10 inches, at least 2 inches deep). Scrape the risen batter into the pan and spread it into an even layer with a spatula, smoothing the top.
- Arrange about 450 g (roughly one 16-ounce jar or can) drained, sliced cinnamon apples or apple pie filling evenly over the batter in a single layer, leaving a bit of space at the edges if desired to prevent overflow.
- Make the cinnamon swirl: In a small bowl, mix 113 g very soft butter, 150 g packed brown sugar, 12 g ground cinnamon, and a pinch (about 1 g) fine sea salt until it forms a smooth paste. Dollop this mixture all over the apple-topped batter, then use a knife or spatula to gently swirl it through the top, creating marbled streaks without fully mixing it in.
- Second rise: Cover the pan lightly and let the assembled cake rise in a warm spot for another 20–30 minutes. It should puff slightly and look a bit lighter.
- Meanwhile, preheat the oven to 350°F (175°C). Place the pan on a baking sheet to catch any potential drips.
- Bake on the center rack at 350°F for 35–45 minutes, until the top is deeply golden, the edges are set, and the center no longer looks wet. A toothpick or skewer inserted in the center should come out with moist crumbs but not raw batter.
- While the cake bakes, make the cream cheese glaze: Beat 85 g softened cream cheese and 14 g softened butter together until very smooth. Add 120 g powdered sugar, 5 g vanilla, a pinch of fine sea salt, and 1–2 tablespoons of milk or cream. Beat until thick but pourable, adding a few drops more milk if needed to reach a drizzling consistency.
- Cool the cake in the pan for 15–20 minutes. While still warm, drizzle the cream cheese glaze generously over the top, letting it run into the swirls and apple pockets. Serve warm in wedges, and store leftovers covered at room temperature overnight or in the fridge after that. Rewarm gently for best texture.
Notes
Tips & Storage Notes
For a non-alcoholic drink pairing, try strong black coffee or spiced chai with this cake; both go well with the cinnamon and apples. Store any leftovers in the fridge in an airtight container or cover the pie dish with plastic wrap. You can gently reheat slices the next day for a warm breakfast or brunch. The cake keeps in the refrigerator for 2 to 3 days.
If you’d like more gluten-free recipes, subscribe to this blog and join our Facebook group, Fresh Milled Flour | Gluten Free Grains.
Affiliate Disclosure
This post includes affiliate links. If you choose to purchase through them, I may earn a small commission at no extra cost to you. This helps offset the extra cost of recipe testing and allows me to continue sharing free recipes made with whole foods.
Leave a Reply