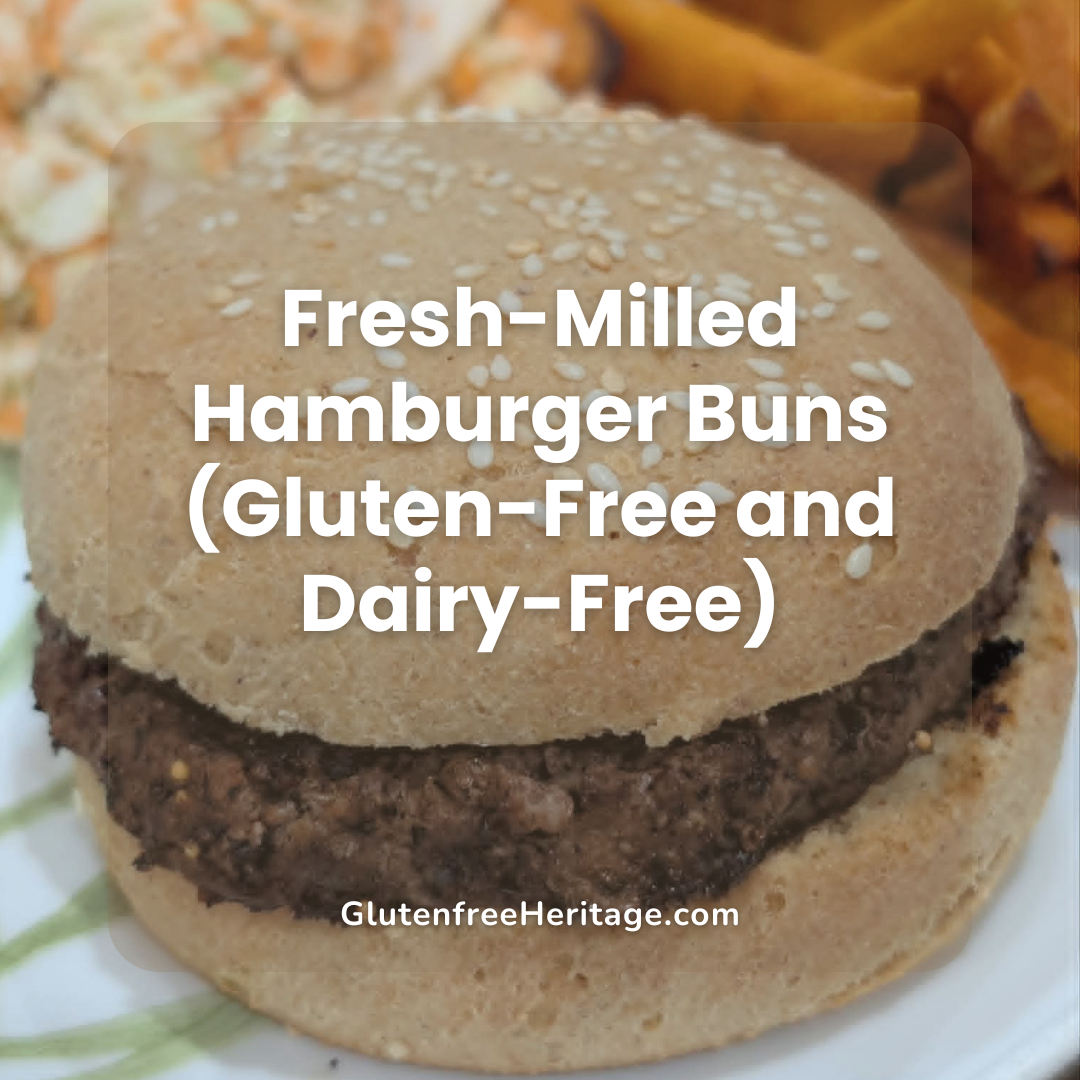
Store-bought buns have nothing on homemade burger buns that are soft, perfectly sized, and made with ingredients you can feel good about. These gluten-free hamburger buns are dairy-free, incredibly versatile, and surprisingly easy to make, even if it’s your first time working with gluten-free flours. Whether you’re planning burger night, need a bun for pulled BBQ sandwiches, or want to make hot breakfast sandwiches, this free hamburger bun recipe delivers a great bun every single time.
I developed this recipe as a variation of my Soft Millet & Sorghum Yeast Bread Rolls, which quickly became a household favorite. After using those rolls as hamburger buns a few times, I realized that with just a few tweaks, I could create a recipe specifically designed for buns. The result is a tender, slightly sweet yeast bread that holds up beautifully to your favorite toppings without falling apart or becoming soggy.
Why You’ll Love These Gluten-Free Burger Buns
These buns are not your typical store-bought variety. They’re gluten-free, dairy-free, and made with fresh milled flour for optimal nutrition and flavor. Unlike many gluten-free products you’ll find at the grocery store, these buns have a soft texture that doesn’t crumble and a subtle flavor that complements rather than competes with your burger or sandwich fillings.
The combination of millet flour and sorghum flour creates a wonderful base, while tapioca starch (also known as tapioca flour) provides structure and a tender crumb. The psyllium husk powder acts as a binder, replacing the gluten that would typically hold everything together. There’s no need for xanthan gum in this recipe, which many people appreciate since the eggs and psyllium provide excellent binding.
Milling Fresh Flour for Better Nutrition
One of the things that makes these homemade burger buns truly special is the use of freshly milled flour. I use my NutriMill Harvest to mill millet and sorghum into flour right before baking. Fresh milling preserves nutrients often lost in commercial flour processing, giving you a custom gluten-free flour blend that’s far superior to what you’ll find in most gluten-free products at the store.
If you don’t have a grain mill, you can certainly use pre-ground millet flour and sorghum flour from brands like Bob’s Red Mill. Just store your gluten-free flour blend in an airtight container in a cool, dry place for best results.


The Secret to Soft, Bakery-Style Buns
The key to achieving that bakery-quality texture in gluten-free bread recipes lies in a few important steps. First, activating the active dry yeast properly ensures a good rise. You can also use instant yeast if that’s what you have on hand, though you’ll skip the activation step and mix it directly with the dry ingredients.
Second, allowing the dough to rest after mixing gives the psyllium husk powder time to fully hydrate. This creates a dough that’s easier to shape and bakes up with a better texture. Be sure to use psyllium husk powder rather than whole husks, as the powder integrates more smoothly into the dough.
Third, the combination of yeast and baking powder gives these buns a slight lift without requiring an extensive dough rise time. While traditional yeast bread might need hours to rise, these buns are ready to bake in about an hour.
Mixing the Dough
I love using my Bosch Universal Plus Mixer to bring the dough together quickly and efficiently. If you’re using a stand mixer, use the paddle attachment and mix on low speed initially to combine the wet ingredients and dry ingredients, then increase to medium speed for about 30 seconds until everything is well incorporated.
The beauty of this dough is that it doesn’t require kneading like traditional wheat-based bread. Gluten-free flours behave differently, and overmixing can actually make the texture gummy. Once your yeast mixture is foamy and you’ve combined everything in a large bowl or the bowl of a mixer, you’re essentially done with the mixing process.


Shaping Your Buns
After the dough has rested, it’s time to shape your buns. Lightly oil your hands to prevent sticking, then divide the dough into six equal portions. Gently form each portion into a smooth ball and place them on a baking sheet lined with parchment paper or a silicone mat.
For that classic look, you can brush the top of the buns with an egg wash (or use egg whites if you prefer) and sprinkle with sesame seeds, poppy seeds, or even bagel seasoning. These toppings aren’t just decorative; they add a delightful crunch and extra flavor.
Place the shaped dough balls in a warm place to rise. I usually set mine near my preheating oven. The buns should become puffy after 45-60 minutes, though they won’t necessarily double in size like traditional wheat bread.
Baking to Golden Perfection
When your buns have risen, and your oven has preheated to 375°F (190°C), it’s time to bake. Slide the baking sheet into the oven and bake for 18-22 minutes, until the tops are golden brown and the internal temperature reaches about 200°F (93°C).
Once done, transfer the buns to a wire rack to cool slightly. They’re best served warm, though they’ll stay fresh stored in an airtight container for 2-3 days. I store my leftovers in the refrigerator and then warm them up in a toaster oven.


Versatile and Customizable
While this recipe makes amazing gluten-free burger buns, don’t limit yourself to them. The same dough can work beautifully for hot dog buns. Just shape it into oblongs instead of rounds. Next time, you might want to experiment with different toppings or seasonings mixed into the dough itself.
You can swap the plant-based butter for extra-virgin olive oil or avocado oil, depending on your preferences. The plant-based milk can be almond milk, oat milk, or any variety you have on hand, as long as it’s warmed to the right temperature.
If you prefer your buns slightly sweeter, you can substitute the honey with cane sugar or agave. For a savory version, consider adding a pinch of sea salt to the top before baking or incorporating herbs into the dough.
Tips for Best Results
Bring all of your wet ingredients to room temperature before mixing. This helps the dough come together more smoothly and ensures even rising.
Don’t skip the resting period after mixing. Those 5-7 minutes are crucial for the psyllium to hydrate properly.
If you’re new to gluten-free baking, use a kitchen scale for accuracy. Gluten-free flours can vary significantly in weight, and precision matters.
The dough should be soft and slightly sticky but manageable. If it seems too wet, you can add a tablespoon of brown rice flour, white rice flour, or potato starch. If it’s too dry, add warm water a teaspoon at a time.
These buns are perfect for burger night, but also work wonderfully for pulled BBQ, grilled chicken sandwiches, or even as a base for breakfast sandwiches with eggs and vegetables.
A Recipe Worth Making Again and Again
If you’ve been searching for free recipes that deliver truly amazing gluten-free results, this is one to add to your collection. I’m confident it will be a hit in your kitchen too. Don’t forget to leave a comment below to let me know how it turned out for you!
Whether you’re gluten-free by necessity or choice, these homemade gluten-free hamburger buns prove that you don’t have to sacrifice quality or taste. With fresh-milled flour, simple ingredients, and a straightforward process, you can enjoy soft, delicious buns that rival any bakery version.

Fresh Milled Hamburger Buns (Gluten-Free and Dairy-Free)
Ingredients
Dry
- 1¼ cups millet flour (160 g)
- ½ cup sorghum flour (60 g)
- ¾ cup tapioca starch (90 g)
- 1 tbsp psyllium husk powder (10 g)
- 2 tsp baking powder ( 8 g)
- ¾-1 tsp ea salt (5–6 g)
Wet
- 1 cup warm plant-based milk 110°F / 43°C (240 g)
- 1 large egg room temperature (~50 g)
- 3 tbsp melted, plant-based butter (42 g)
- 1 tbsp honey (21 g)
- 1 tsp apple cider vinegar (5 g)
- 2 tsp active dry yeast (6 g)
Instructions
- Activate the yeast: In a small bowl, combine warm, plant-based milk (110°F / 43°C), honey, and active dry yeast. Stir gently and let sit 5–10 minutes until foamy and bubbly.
- Mix dry ingredients in a large bowl (millet, sorghum, tapioca, psyllium, baking powder, and salt).
- Combine wet ingredients (plant-based milk + yeast mixture, egg, melted plant-based butter, vinegar) into the dry ingredients.
- Dough should be soft, slightly sticky, and thick.
- Let rest 5–7 minutes for psyllium to fully hydrate.
- Shape rolls: lightly oil hands and form 6 rolls. Place on a greased or parchment-lined baking sheet.
- Rise: cover loosely and let rise in a warm spot 45–60 minutes, until puffy (not necessarily doubled). Optional: Sprinkle with sesame seeds.
- Preheat oven to 375°F (190°C).
- Bake: 18–22 minutes, until tops are lightly golden and internal temp ~200°F (93°C).
- Cool slightly (10 minutes) and serve warm.
Affiliate Disclosure
This blog post contains affiliate links. Purchases made through these links help support Gluten-Free Heritage at no additional cost to you. Thank you for supporting this work.
Leave a Reply