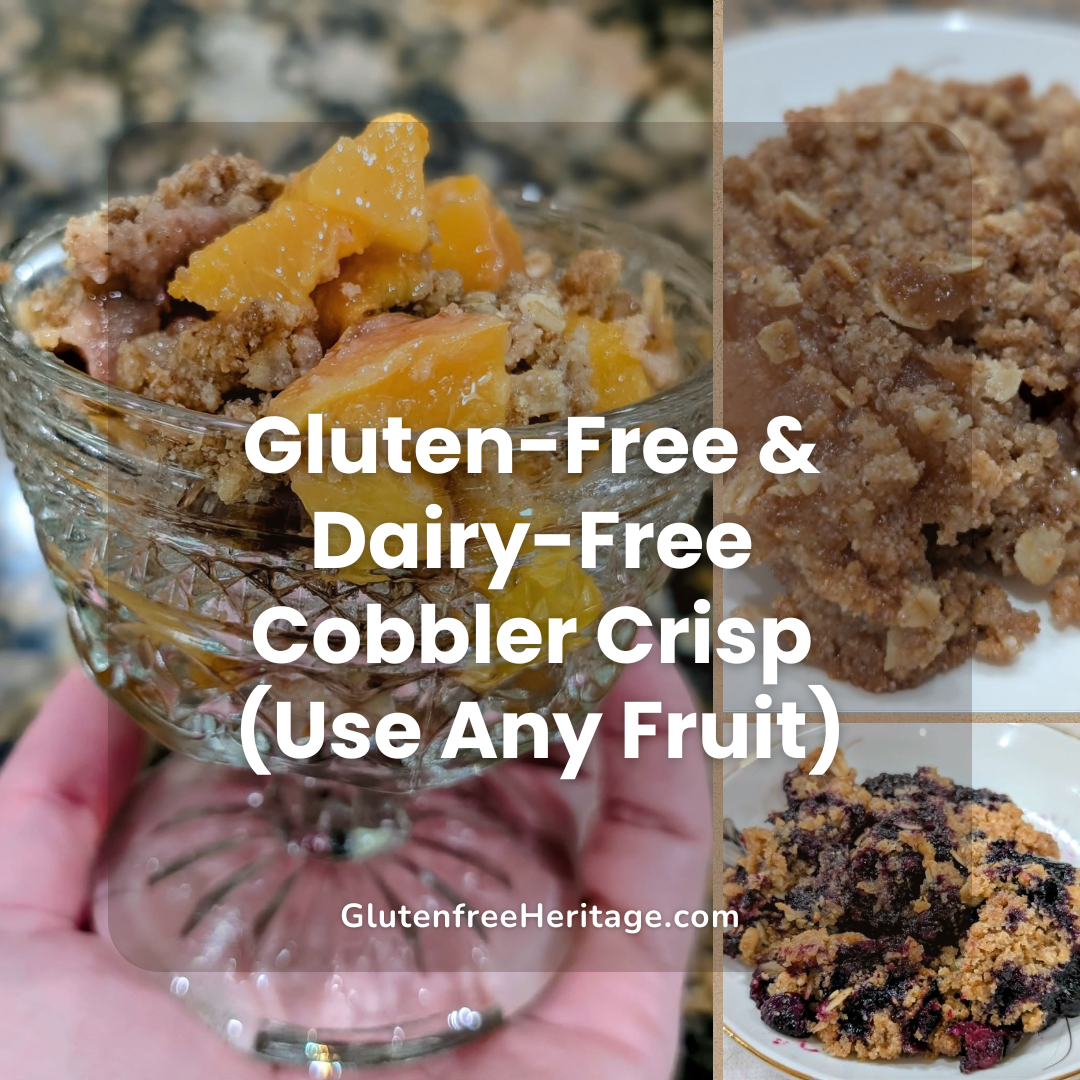
Easy Gluten-Free & Dairy-Free Fruit Cobbler Crisp (Blueberries, Peaches, Apples & More)


There’s something comforting about a warm fruit dessert fresh from the oven, especially when it bridges the gap between nostalgia and modern dietary needs. My grandmother’s old-fashioned cobblers were the best, but they were loaded with dairy and gluten. When I needed to adapt her recipes for my own dietary restrictions, I discovered I could create something even better: a versatile oat cobbler crisp that works with any fruit you have on hand.
This recipe was inspired by a cruise, where I enjoyed some truly delicious gluten-free and dairy-free desserts. The crisp topping on those desserts was delightful, but I found myself craving the familiar comfort of my grandmother’s cobblers. What I came up with is the best of both worlds. It’s made similarly to a traditional cobbler but with gluten-free and dairy-free ingredients, and it provides that pleasing crisp from the oat and gluten-free flour blend topping that makes every bite satisfying.
Why This Easy Gluten-Free Recipe Works
This gluten-free dessert comes together quickly and delivers consistent results every time. I’ve tested it with fresh seasonal blueberries at their peak, home-canned cinnamon apples I preserved in the fall, canned pears I rotated out of the pantry, and most recently, juicy fresh Georgia peaches. The recipe is so versatile and easy that you’ll want to save it, print it, and refer to it until you have it memorized.
The beauty of this fruit crisp is its adaptability. During peach season, when sweet peaches are abundant at farmers’ markets, you can create a perfect summer dessert. When fresh berries come into season, swap them in for a mixed berry crisp. Have some stone fruit that needs using? This crumble topping works beautifully over any fruit filling you choose.
Starting With Fresh-Milled Flour
I start with this all-purpose, gluten-free, fresh-milled flour as the main ingredient and make it with my NutriMill Harvest, though I’ve also used the NutriMill Classic with excellent results. Fresh-milling your own flour from whole grains gives you the freshest, most nutritious option possible. You can save $20 with code VINTAGEVIRTUES on the Classic or Impact mills if you’re interested in getting started with home milling.
I buy certified gluten-free oats and grains from Azure Standard, which ensures I’m getting quality ingredients without cross-contamination concerns. Using certified gluten-free oats is essential for anyone with celiac disease or serious gluten sensitivity.


Choosing Your Fruit
The flexibility of the fruit in this recipe means you can adapt to what’s available in your kitchen or at your local market. Fresh fruit always delivers the best results, but frozen berries work wonderfully too. Just let them thaw slightly and drain excess juices before using them in your baking dish.
For the perfect peach cobbler, choose ripe peaches that give slightly when pressed. For an 8×8, You’ll need about 2-3 cups of fruit, cut into smaller pieces. Fresh peaches create a juicy peach filling that’s hard to beat. If you’re making a gluten-free apple crumble, home-canned apples work beautifully, or cook down fresh apples for a softer texture.
Stone fruit like peaches, nectarines, and plums will all work wonderfully in this recipe. I’m even considering figs when mine come to maturity. Although not required in this recipe, one optional tip is to add a squeeze of lemon juice and some lemon zest to brighten the flavors and help the fruit juices thicken during baking.
The Crisp Topping
The crumble topping is the icing on the cake! In a large mixing bowl, combine your dry ingredients. I use a combination of traditional oats, all-purpose GF flour (freshly milled), brown sugar, and dairy-free butter, with optional cinnamon powder.
For sweetness, I use brown sugar, though coconut sugar, or even white sugar, will work, depending on your dietary preferences. I find coconut sugar to be the next-best substitute, with its lower glycemic index and deep, caramel-like sweetness.
The fat component is crucial for achieving that golden brown, crispy top. Myoko’s is my favorite vegan butter, and I’m experimenting with a homemade version. But Earth Balance Country Crock works as well. Make sure your vegan butter is at room temperature before mixing it into the dry ingredients. You want the mixture to form clumps that will create that irresistible crisp texture.
Assembly and Baking
Pour your prepared fruit into a baking dish or cast iron skillet. If your fruit seems particularly juicy, toss it with a couple of tablespoons gluten-free flour, tapioca starch, corn starch, or arrowroot starch to help absorb the fruit juices and prevent a soggy finished product.
Sprinkle the oat crumble topping evenly over the peaches, blueberries, or whatever fruit you’re using. Don’t press it down; just let it sit loosely on top. As it bakes, the cobbler topping will brown beautifully, creating that perfect crispy layer.
Bake until the topping is golden brown and you can see the berry filling or peach juices bubbling around the edges. This usually takes about 30-35 minutes at 400 degrees Fahrenheit.
Serving and Storage
This delicious dessert is best served warm with a scoop of vanilla ice cream (dairy-free, of course) melting into the fruit filling. The contrast of temperatures and textures is absolutely delightful. It’s the kind of sweet desserts that disappear quickly, but if you’re lucky enough to have leftovers, it makes a great breakfast dish as well!
Store any leftovers in an airtight container at room temperature for 3-4 days, though I doubt it will last that long.
Tips for the Best Free Cobbler Crisp
For an easy cobbler crisp recipe that truly shines, use the ripest, sweetest fruit you can find.
This healthy recipe doesn’t taste like a compromise. It’s genuinely delicious, and most people can’t tell it’s gluten-free and dairy-free. The combination of oat and fresh-milled, gluten-free flours gives you the nutrition of whole grains without sacrificing texture.
Whether you’re making a fresh peach cobbler, gluten-free apple crumble, or blueberry crisp with whatever’s in season, this recipe delivers consistent, delicious results every time. Check out the recipe card below for exact measurements and detailed instructions.
This dessert recipe has become a staple in my kitchen, and I hope it becomes one in yours too. The versatility of swapping fruits means you’re never more than an hour away from a warm, comforting dessert that reminds you of grandma’s kitchen while meeting your modern dietary needs. Let me know which fruit combination becomes your favorite!

Gluten-Free Dairy-Free Cobbler Crisp (Use Any Fruit)
Ingredients
- 2-3 cups fruit; fresh, frozen & thawed, or canned fruit (~300-450 g)
- 3/4 cup gluten-free fresh-milled flour blend (90 g)
- 1/4 cup old-fashioned oats (certified gluten-free) (20 g)
- 1/2 cup brown sugar packed (110 g)
- 1/2 cup / 1 stick dairy-free butter room temperature (113 g)
- 1 tbsp cinnamon optional
Instructions
- Preheat the oven to 400°F. Lightly grease an 8 x 8-inch baking dish.
- Spread fruit evenly in the bottom of the baking dish.
- In a medium bowl, combine the gluten-free fresh-milled flour blend (try my Cup4Cup blend), old-fashioned oats, packed brown sugar, and optional 1 tbsp cinnamon.
- Cut in the cold dairy-free butter with a pastry cutter or fork until the mixture resembles coarse crumbs with some pea-sized pieces remaining.
- Sprinkle the crumble evenly over the fruit, covering the fruit in a loose, rustic layer.
- Bake for about 30 minutes, or until the topping is golden brown and the blueberries are bubbling around the edges.
- Let the cobbler cool for at least 10 minutes before serving so the filling can thicken slightly.
- Serve warm on its own or with dairy-free vanilla ice cream.
Affiliate Disclosure
This blog post contains affiliate links. Purchases made through these links help support Gluten-Free Heritage at no additional cost to you. Thank you for supporting this work!
Leave a Reply